fx Commander
![]() This script is designed for managing the "actions" (Photoshop macros) that appear on the "Photo Effects" tab of the Effects panel.
This script is designed for managing the "actions" (Photoshop macros) that appear on the "Photo Effects" tab of the Effects panel.
The script interface is divided in two halves:
- The panel to your left displays the contents of the "...\ProgramData\Adobe\Photoshop Elements\24.0\Photo Creations\photo effects" folder, that is, all the actions available in PSE.
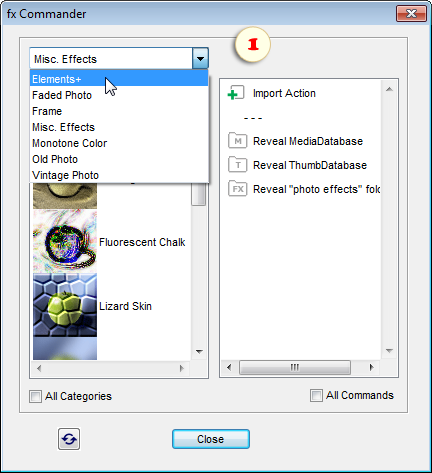
To navigate the effect categories you use the drop menu over the actions list (fig. 1).
To see all the effects from all the categories simultaneously, check the "All Categories" gadget under the actions panel.
- The panel to your right displays all the currently applicable commands.
How to add to your Effects a new action (*.ATN file), e.g., downloaded from the Internet:
- In case the ATN file is provided with a PNG thumbnail and a XML metadata file (that is, if the action is already properly prepared for PSE), unpack/copy all the three files into the same folder.
If such PNG and/or XML files aren't available, the script will add them automatically.
- Launch the "fx Commander"script.
- In the Commands panel, double-click the "Import Action" line.
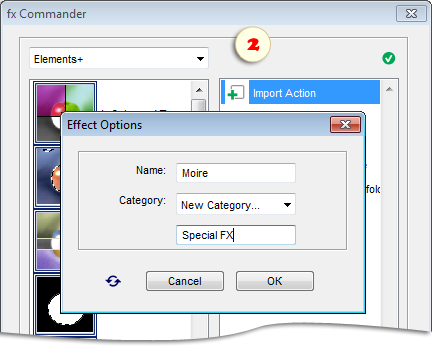
- In the "Name" field of the dialog that opens, edit, if necessary, the text that will be displayed in the Effects panel.
- In the "Category" menu, choose a target category for the effect.
To create a new category, select the "New Category..." item and enter some name in the text field that appears (fig. 2).
- Press "OK" to add the effect.
Important! The changes will be displayed in the Effects panel after re-building the PSE cache file.
How to manage the existing actions/effects:
- Select an effect in the left panel.
- Double-click a command in the Commands panel:
- The "Rename Action" command lets you alter the action name displayed in the Effects palette.
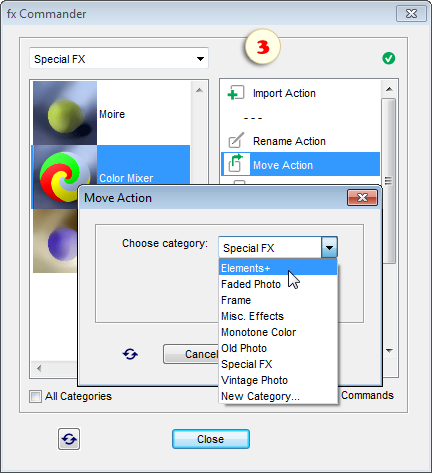
- The "Move Action" command changes the category, where the selected action will appear.
- The "Duplicate Action" command lets you create a copy of the selected effect with a different name and/or in a different category.
The screenshot 3 exemplifies moving the "Color Mixer" script from "Special FX" to "Elements+" category.
- The "Delete Action" command removes the selected effect.
The following batch of commands is intended for handling the effect thumbnails:
- The "Edit Thumbnail" command merely opens the selected action's thumbnail for editing in PSE.
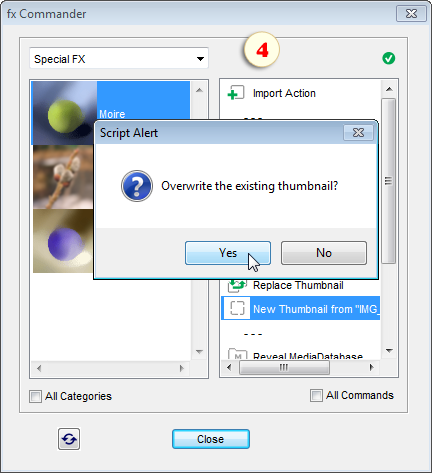
- The "Replace Thumbnail" command lets you replace the current thumbnail of the selected action with another image. In case the graphic file hasn't been formatted properly, the script will do it automatically.
- The "New Thumbnail..." command creates a new thumbnail from the currently active document. In case an action is selected at the moment in the left panel, the script will suggest replacing its thumbnail with the just created one (fig. 4).
As we already know, any changes made with the "fx Commander" will take place in the Effects panel only after rebuilding the PSE cache-file (MediaDatabase.db3). Since, in the Windows environment, we can't delete it while Photoshop Elements is working, the author suggests the following workaround:
- Complete all the required action manipulations.
- Apply the "Reveal MediaDatabase" command that opens the "cache" folder in the "Explorer" window.
- Quit Photoshop Elements.
- In the "Explorer" window, delete the "MediaDatabase.db3" file.
- Restart PSE and wait for the Effects to rebuild.
Please keep in mind that PSE caches the thumbnails in a separate file. So, to update the images in the Effects panel you have to delete this file as well:
- Apply the "Reveal MediaDatabase" command.
- Apply the "Reveal ThumbDatabase" command.
- Quit Photoshop Elements.
- Delete the "MediaDatabase.db3" file.
- Delete the "ThumbDatabase.db3" file.
- Restart PSE.
Note: This script doesn't work with App Store version of Photoshop Elements.